WebサイトにGithubアカウントでログインする機能を実装する[実装編]
「WebサイトにGithubアカウントでログインする機能を実装する」
の第二回、実装編です
前回の準備編はこちら
![WebサイトにGithubアカウントでログインする機能を実装する[準備編]](https://blog.4breaker.com/wp-content/uploads/2020/06/スクリーンショット-2020-06-11-18.02.28-100x100.png)
実装
実装にあたり、参考にした公式ドキュメントはこちらです
1. Githubログインページへの遷移

自分のウェブサイトのログインページ(Githubアカウントのログイン認証機能を実装するページ)に、Githubへのリンクを貼ったボタンを設置します
ユーザが遷移するページ

自分のサイトに設置したログインボタンをクリックしたユーザには、このようなGithubのログインページが表示されます
準備編で取得したクライアントIDをGETパラメータとして付加します
GithubログインページのURL:
https://github.com/login/oauth/authorize
<!-- 1. Githubログインページへの遷移 -->
<a href="https://github.com/login/oauth/authorize?client_id=クライアントID">Log in with GitHub</a>
2. 認証後のリダイレクト
無事Github側でユーザ認証が終わったら、自分のウェブサイト側にリダイレクトされます
リダイレクトされるURLは準備編で設定した「Authorization callback URL」です
この時、PHPファイルで「code」というGETパラメータを取得します
このcodeはのちに、アクセストークンの取得に利用します
// 2.codeの取得
$code = filter_input(INPUT_GET, "code");
3. アクセストークンの取得
リダイレクトされたページ内で、先ほど取得したcodeを送信してアクセストークンを取得します
アクセストークンを取得するURL:
https://github.com/login/oauth/access_token
/**
 * HTTPリクエスト用の関数
 */
function httpRequest($curlType, $url, $params = null, $header = null)
{
    $headerParams = $header;
    $curl         = curl_init($url);

    if ($curlType == 'post') {
        curl_setopt($curl, CURLOPT_POST, TRUE);
        curl_setopt($curl, CURLOPT_POSTFIELDS, http_build_query($params));
    }
    else {
        curl_setopt($curl, CURLOPT_CUSTOMREQUEST, 'GET');
    }

    curl_setopt($curl, CURLOPT_USERAGENT, "USER_AGENT");
    curl_setopt($curl, CURLOPT_SSL_VERIFYPEER, FALSE);  // オレオレ証明書対策
    curl_setopt($curl, CURLOPT_SSL_VERIFYHOST, FALSE);  //
    curl_setopt($curl, CURLOPT_COOKIEJAR, 'cookie');
    curl_setopt($curl, CURLOPT_COOKIEFILE, 'tmp');
    curl_setopt($curl, CURLOPT_FOLLOWLOCATION, TRUE); // Locationヘッダを追跡
    curl_setopt($curl, CURLOPT_RETURNTRANSFER, TRUE);
    curl_setopt($curl, CURLOPT_HTTPHEADER, $headerParams);
    $output = curl_exec($curl);
    curl_close($curl);
    return $output;
}

// 2.codeの取得
$code = filter_input(INPUT_GET, "code");

// ポストするパラメータを生成
$POST_DATA = array(
    'client_id'     => 'クライアントID(準備編で取得したやつ)',
    'client_secret' => 'クライアントシークレット(準備編で取得したやつ)',
    'code'          => $code,
);

// 3. アクセストークンの取得
$resultAT = httpRequest('post', "https://github.com/login/oauth/access_token", $POST_DATA, ["Accept: application/json"]);

// 返却地をJsonでデコード
$resJsonAT = json_decode($resultAT, true);

// アクセストークン
echo $resJsonAT['access_token'];9082fj2wkjf0329jfwklj23kj234
jsonで取得
返却値のフォーマットは色々な形式が選択できますが、僕は後々に処理しやすいJsonにしています
フォーマットの指定はヘッダーで行います
“Accept: application/json"の部分ですね
4. APIでユーザ情報の取得
アクセストークンを取得できたので、ここでやっとユーザ情報の取得になります
APIのURL:
https://api.github.com/user
// 4. APIでユーザ情報の取得
$resultUser = httpRequest('get', "https://api.github.com/user", null, ["Authorization: Token " . $resJsonAT['access_token']]);

// 返却地をJsonでデコード
$resJsonUser = json_decode($resultUser, true);

// ユーザ情報
var_dump($resJsonUser);

// DB登録処理とかarray(32) {
[“login"]=>
string(8) “AppName"
[“id"]=>
int(66671461)
[“node_id"]=>
string(20) “ABCDEFGHIJK"
[“avatar_url"]=>
string(53) “https://abc.github.com/u/123456789?v=4"
[“gravatar_id"]=>
string(0) “"
[“url"]=>
string(37) “https://api.github.com/users/AppName"
[“html_url"]=>
string(27) “https://github.com/AppName"
[“followers_url"]=>
string(47) “https://api.github.com/users/AppName/followers"
[“following_url"]=>
string(60) “https://api.github.com/users/AppName/following{/other_user}"
[“gists_url"]=>
string(53) “https://api.github.com/users/AppName/gists{/gist_id}"
[“starred_url"]=>
string(60) “https://api.github.com/users/AppName/starred{/owner}{/repo}"
[“subscriptions_url"]=>
string(51) “https://api.github.com/users/AppName/subscriptions"
[“organizations_url"]=>
string(42) “https://api.github.com/users/AppName/orgs"
[“repos_url"]=>
string(43) “https://api.github.com/users/AppName/repos"
[“events_url"]=>
string(54) “https://api.github.com/users/AppName/events{/privacy}"
[“received_events_url"]=>
string(53) “https://api.github.com/users/AppName/received_events"
[“type"]=>
string(4) “User"
[“site_admin"]=>
bool(false)
[“name"]=>
NULL
[“company"]=>
NULL
[“blog"]=>
string(0) “"
[“location"]=>
NULL
[“email"]=>
NULL
[“hireable"]=>
NULL
[“bio"]=>
NULL
[“twitter_username"]=>
NULL
[“public_repos"]=>
int(0)
[“public_gists"]=>
int(0)
[“followers"]=>
int(0)
[“following"]=>
int(0)
[“created_at"]=>
string(20) “2020-06-09T09:17:03Z"
[“updated_at"]=>
string(20) “2020-06-11T09:08:03Z"
}
Emailの取得
基本的なユーザ情報の取得は以上ですが、これだけだとユーザのメールアドレスは取得できません
(返却値のemail欄がnullのままです)
そこでEmailの取得するための方法を説明します
Emailの取得に関する公式ドキュメントはこちらです
1.scopeの追加
Githubのログインページへと遷移するリンクに、scopeパラメータを追加します
この時色々な権限を追加できますが、Emailは「user:email」になります
そのほかのscopeについてはこちらのページをご覧ください
<!-- 1. Githubログインページへの遷移(Emailのscopeを追加) -->
<a href="https://github.com/login/oauth/authorize?client_id=クライアントID&scope=user:email">Log in with GitHub</a>
2.APIへリクエスト
ユーザ情報を取得するのと同じ様に、ユーザのEmail情報を取得します
APIのURL:
https://api.github.com/user/emails
//  APIでユーザのEmail情報を取得
$resultEmail   = httpRequest('get', "https://api.github.com/user/emails", null, ["Authorization: Token " . "アクセストークン"]);

// 返却地をJsonでデコード
$resJsonEmails = json_decode($resultEmail, true);

echo $resJsonEmails[0]['email'];abcde@mail.com
メールが届く
この時点で、Githubから以下のメールが届きました
Hey AppName!
Previously, a third-party OAuth application (AppName) did not have any scopes. It was recently granted an additional scope (user:email).
Visit https://github.com/settings/connections/applications/sda0f898fw09fdsfs for more information.
To see this and other security events for your account, visit https://github.com/settings/security If you run into problems, please contact support by visiting https://github.com/contact
Thanks,
The GitHub Team
Emailのスコープが追加されたことに対するお知らせです
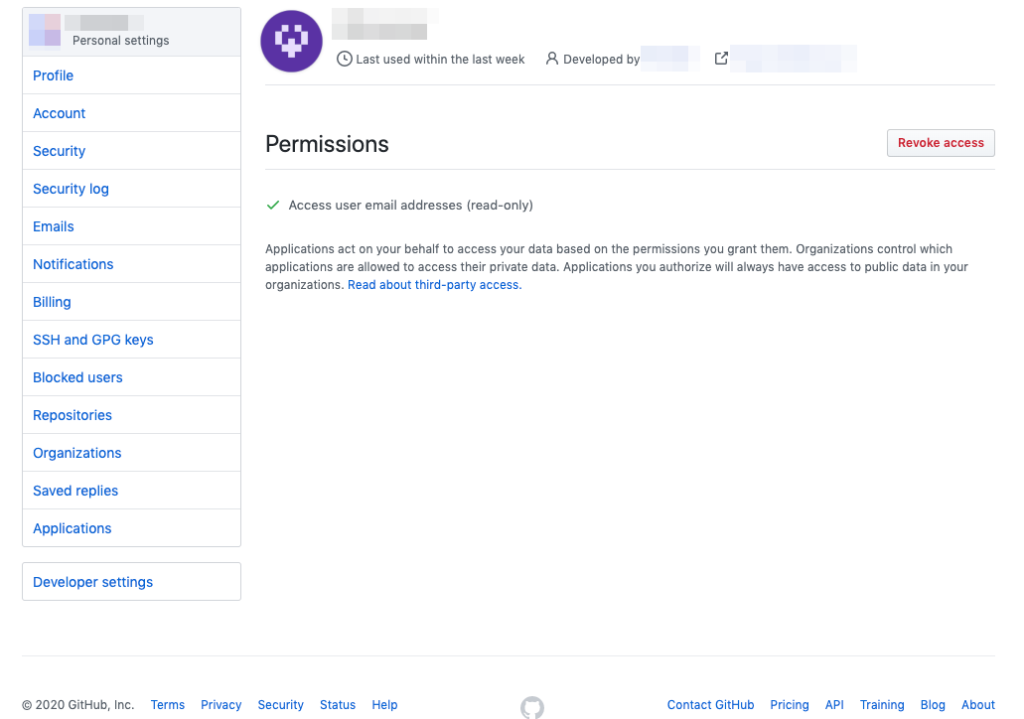
ちなみに、リンクをクリックすると以下の画面が表示されました
注意点
1.ユーザ情報取得APIで送信するパラメータは必ずヘッダーで
「4. APIでユーザ情報の取得」でユーザ情報を取得する際、ヘッダーでアクセストークンを付加しています
この時、
「ヘッダーで送らなくても、パラメータを直接GETでURLに付け足しちゃえばいいんじゃね?」
と思いがちですが、URLに付加するやり方は現在では非推奨となっていますのでご注意ください
NGなやり方
// 4. APIでユーザ情報の取得
$resultUser = httpRequest('get', "https://api.github.com/user?access_token=jkl23jklf23jfkl23f", null, null);
2. APIへリクエストする時はユーザーエージェントが必須
GithubのAPIへリクエストする時は必ずユーザーエージェントを設定します
Curlのオプションで指定してる以下の部分がそれにあたります
curl_setopt($curl, CURLOPT_USERAGENT, "USER_AGENT");3.取得するEmailには、自動生成されたメールも含まれる
「Emailの取得」で紹介した方法では、GIthubが自動生成する(?)メールアドレスも一緒に返却されます
array(2) {
[0]=>
array(4) {
[“email"]=>
string(19) “main@mail.com"
[“primary"]=>
bool(true)
[“verified"]=>
bool(true)
[“visibility"]=>
string(7) “private"
}
[1]=>
array(4) {
[“email"]=>
string(42) “123456789+appname@users.noreply.github.com"
[“primary"]=>
bool(false)
[“verified"]=>
bool(true)
[“visibility"]=>
NULL
}
}
なので、primaryやverifiedで判定してユーザのメールアドレスであることを判別する必要があります